First Sight

Screening Process, Instructions and Assembly for First Sight RECTANGULAR FRAMES Myopia and Hyperopia (Near and Far Sight)

Delivering On-The-Spot Customized Prescription Eyeglasses for Children and Adults

Greetings!

My name is Nizar Mamdani. I was born in a small town in Tanzania, East Africa, and received my education in both Tanzania and Japan. Together with my wife, Dr. Marsha Mamdani (Ph.D.), we founded First Sight Eyeglasses, Inc., a 501(c)(3) organization dedicated to transforming global vision care by providing affordable and accessible eyeglasses in under ten minutes. To date, tens of thousands of First Sight’s high-quality eyeglasses have been distributed across 31 countries.

We believe that your commitment, along with that of the EDC organization, to improving lives aligns seamlessly with our mission. By integrating First Sight eyeglasses into your programs, we can significantly enhance educational outcomes and overall quality of life for those affected by vision problems.

First Sight is a groundbreaking initiative aimed at addressing one of the most common yet overlooked challenges in developing regions: vision impairment among schoolchildren and adults. Our solution is uniquely designed to meet the needs of individuals in resource-limited areas.

Clinically tested by a major medical center, First Sight eyeglasses exemplify simplicity and efficiency. Here’s what makes them ideal for your programs:

  • Low Tech, High Impact: Our eyeglasses are designed for ease of use, requiring no electricity or sophisticated equipment.
  • Quick and Efficient: A non-professional can conduct visual screenings and fit customized eyeglasses on the spot in under 10 minutes.
  • Foolproof and Accessible: Creating customized prescription eyeglasses with First Sight is straightforward, ensuring that anyone, regardless of their technical expertise, can manage the process with ease.
  • Completely Mobile: Due to their portability, First Sight eyeglasses can be distributed anywhere, perfectly catering to the needs of remote or underserved communities.
  • Speed and Efficiency: Each pair of custom prescription eyeglasses can be prepared in under 10 minutes, providing immediate relief to those in need.
  • Cost-Effective: Our eyeglasses are not only affordable but also enhance accessibility, ensuring vision correction reaches a broader audience.

Thank you for considering this opportunity to profoundly impact the life of a child or an adult by providing a Gift of Sight. We look forward to collaborating for a brighter, clearer future.

Thank you for your enthusiastic participation!

Screening Process, Instructions and Assembly for First Sight RECTANGULAR FRAMES Myopia and Hyperopia (Near and Far Sight) Each Kit Contains the Following:

A First Sight Kit Contains the following

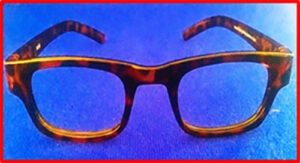
  • 100 Blank Frames
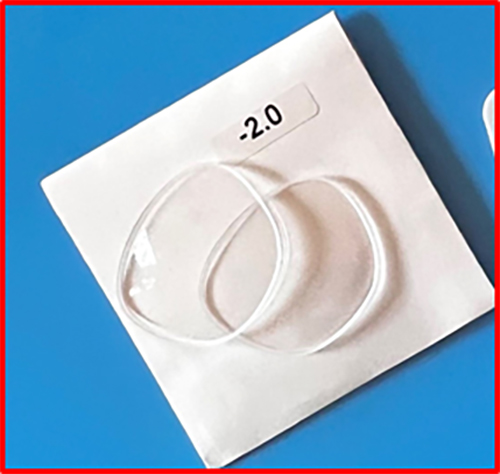
  • 200 Lenses (See details below)
  • 200 Lenses 0 strength (Already mounted on each Frame)
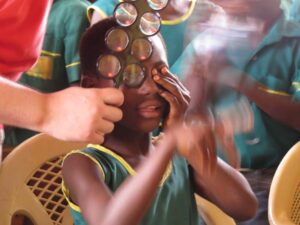
  • 2 Screening Lens Bars/Trees (with 10 Lenses for NEAR Sight)
  • 1 Screening Lens Bar/Tree (with 8 Lenses for FAR Sight)
  • 2 Eye Charts (Heavy-coated, Near sight)
  • 1 Eye Chart (Far sight)
  • 2 Eyesight Blockers/Occluder
  • 1 Tape Measure (3.05 Meter/10 feet)
  • 1 Lens Application Tool
  • 100 Cloth Pouches/Cleaners
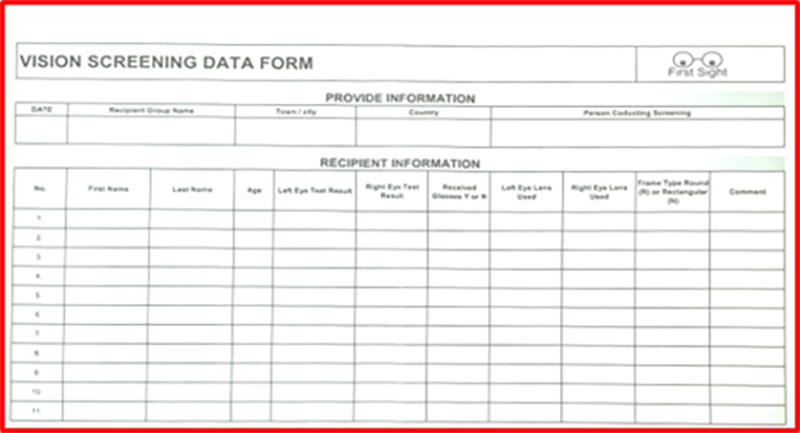
  • 1 Measurement/Record-Keeping Data Form
  • 1 Instruction Manual

Lens Ranges Per Kit

Near Sight Correction Lenses:

  • 200 pcs. 0
  • 20 pcs. -2.25
  • 20 pcs. -1.0
  • 20 pcs. -2.5
  • 30 pcs. -1.5


  • 15 pcs. -3.0
  • 30 pcs. -1.75
  • 7 pcs. -4.0
  • 30 pcs. -2.0
  • 5 pcs. -5.0

Far Sight Correction Lenses:

  • 10 pcs. +1.0
  • 5 pcs. +2.0
  • 5 pcs. +1.5
  • 5 pcs. +2.5


  • 10 pcs. +1.25
  • 3 pcs. +3.0
  • 10 pcs. +1.5
  • 4 pcs. +4.0

Pre-Screening Set Up Process for Myopia/Near Sight (for individuals being tested for distance glasses, -1.50, -2.00 lenses, etc.)

Pre-Screening Setup Process:

  1. Gather Equipment:
    • Ensure you have the necessary tools: lens trial sets (-1.50, -2.00, etc.), an eye chart, a lens tree, and an eye blocker.
    • Prepare medical-grade wipes for cleaning equipment.
  2. Create a Comfortable Environment:
    • Find a well-lit, quiet space for the screening.
    • Arrange seating for the recipient at a comfortable distance from the eye chart.
  3. Prepare the Eye Chart:
    • Position the eye chart at the appropriate height and distance (typically 20 feet or 6 meters) for accurate testing.
  4. Check Equipment:
    • Inspect the lens trial sets and ensure they are clean and free from damage.
    • Set up the lens tree for easy access during the screening.
  5. Sanitize Surfaces:
    • Wipe down any surfaces that will be used during the screening, including the lens tree and eye blocker.

Setup for Visual Screening with Tumbling E’s Eye Charts

  1. Select Location:
    • Choose a well-lit area with ample natural light for optimal visibility of the charts. Ensure the space is free from distractions.
  2. Position the Charts:
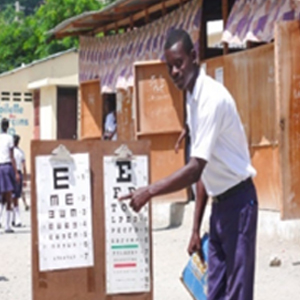
    • Place two identical Tumbling E’s Eye Charts on adjacent walls or solid surfaces at eye level. The charts should be spaced adequately apart to allow the individuals being tested to stand or sit comfortably.
  1. Check Alignment:
    • Ensure that both eye charts are aligned at the same height and distance from the seating area. This will help maintain consistency in testing conditions.
  2. Lighting:
    • Verify that both charts are well-lit. Adjust any lighting as necessary to eliminate shadows or glare, ensuring clear visibility of the letters.
  1. Test Area Preparation:
    • Arrange seating or standing space for the individuals being tested, allowing enough room for them to move between the charts if needed.
  2. Final Check:
    • Confirm that everything is securely positioned, and that the environment is conducive to effective visual screening.

Once set up, you’re ready to conduct the visual screenings using the Tumbling E’s Eye Charts
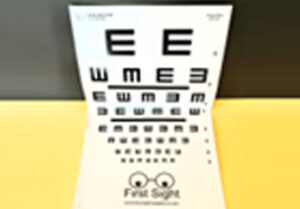
 

Using the provided tape measure, mark 20 feet (6 meters) from the wall. The charts should be in well-lit areas (including natural lighting).

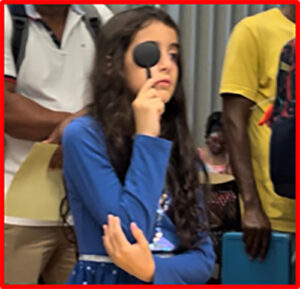
Screening Process for Myopia/Near Sight

  1. Instruct the person being tested to cover their left eye using the Eyesight Blocker included in the First Sight Kit. This will help ensure an accurate assessment of their vision in the right eye.


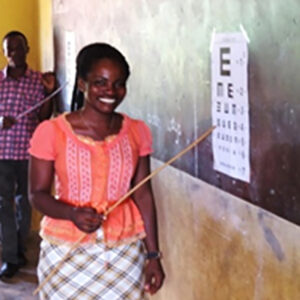
  1. Ask the person being tested to read the Es on the Tumbling Eye Chart by indicating the direction each E is facing. They can use a flat hand gesture to show the direction.
  2. Start at the top of the chart and move downward, allowing the individual to read each line.
  3. Determine the point at which the person can no longer clearly identify the direction of the E.
  4. The last line they read correctly represents their uncorrected visual acuity (UCVA).
  5. Repeat the procedure for the right eye, following the same steps.
  6. If the individual can read all the way to the bottom of the eye chart, their eyesight is considered normal.
  7. If they cannot read to the bottom, move them to the next identical screening station, using a lens tree.

Screening Steps for Near Sight (Myopia) with the Lens Tree

  1. Prepare: The tester holds the First Sight lens tree (BLACK). The person being tested does not hold it.
  2. Occlude Left Eye: Cover the left eye with the Eyesight Blocker.
  3. Read Chart: Ask the person to read the Es on the eye chart, indicating direction with a hand gesture.

  1. Identify Limit: Start at the top and move down until they can no longer read clearly.

  1. Record UCVA: The last line read is their uncorrected visual acuity (UCVA) on the Data sheet provided.

  1. Repeat: Repeat for the right eye and again write the acuity for this eye on the data sheet.
  2. Record Best Lens: Write the chosen lens strength on the Data Form.
  3. Frame Setup:
    • Take a blank frame and the identified lenses needed for eyesight corrections..


Ensure correct placement of lenses in Left and Right sides.
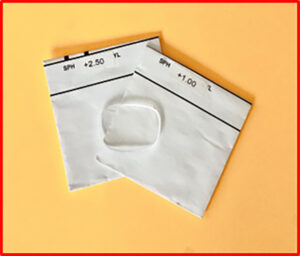
  1. Snap In Lenses: Place lenses in the frame, using the Lens Application Tool if needed.

  1. Lens Adjustment:
    • Occlude the left eye again.
    • Use the Screening Lens Bar over the right eye, starting with “0” lens. Increase power gradually until the person reads clearly.
    • Ask which lens feels better.
  2. Final Adjustment: Clean and adjust for comfort and clarity.

  1. Confirm Fit: Have the recipient read the chart again to ensure correctness.
  2. Package Glasses: Place in the pouch and deliver.

  1. Handle with Care: Advise the recipient to take care of the glasses.
  2. Dispose Safely: Throw away plastic bags in protected garbage. Do not give to recipients.
  3. Annual Testing: Schedule yearly retests.
  4. Data Submission: Email Data Forms to [email protected] (remove names for privacy).
  5. Clean Equipment: Wipe down lens tree and blocker between screenings.
  6. Recycle: Return old glasses for recycling when prescriptions change.

Screening Process for Hyperopia (Far Sight)

  1. Eye Chart Setup
    • Image: Diagram showing two Tumbling E’s eye charts on walls, with markings for the 20 inches (50 cm).
    • Place eye charts at eye level in well-lit areas, marked at appropriate distances.

Screening Process

  1. Instruct the person being tested to cover their left eye using the Eyesight Blocker included in the First Sight Kit. This will help ensure an accurate assessment of their vision in the right eye.
  2. Ask the person being tested to read the Es on the Tumbling Eye Chart by indicating the direction each E is facing. They can use a flat hand gesture to show the direction.
  3. Start at the top of the chart and move downward, allowing the individual to read each line.
  4. Determine the point at which the person can no longer clearly identify the direction of the E.
  5. The last line they read correctly represents their uncorrected visual acuity (UCVA).
  6. Repeat the procedure for the right eye, following the same steps.
  7. If the individual can read all the way to the bottom of the eye chart, their eyesight is considered normal.

If they cannot read to the bottom, move them to the next identical screening station, using a lens tree.

  1. Prepare: The tester holds the RED First Sight lens tree. The person being tested does not hold it.
  2. Occlude Left Eye: Cover the left eye with the Eyesight Blocker.

  1. Read Chart: Ask the person to read the Es on the eye chart, indicating direction with a hand gesture.

  1. Identify Limit: Start at the top and move down until they can no longer read clearly.
  2. Record UCVA: The last line read is their uncorrected visual acuity (UCVA) on the Data sheet provided.

  1. Repeat: Repeat for the right eye and again write the acuity for this eye on the data sheet.
  2. Record Best Lens: Write the chosen lens strength on the Data Form.
  3. Frame Setup:
    • Take a blank frame and the identified lenses needed for eyesight corrections..


Ensure correct placement of lenses in Left and Right sides.

9. Snap In Lenses: Place lenses in the frame, using the Lens Application Tool if needed.

  1. Lens Adjustment:
    • Occlude the left eye again.
    • Use the Screening Lens Bar over the right eye, starting with “0” lens. Increase power gradually until the person reads clearly.
    • Ask which lens feels better.
  2. Final Adjustment: Clean and adjust for comfort and clarity.

  1. Confirm Fit: Have the recipient read the chart again to ensure correctness.
  2. Package Glasses: Place in the pouch and deliver.

  1. Handle with Care: Advise the recipient to take care of the glasses.
  2. Dispose Safely: Throw away plastic bags in protected garbage. Do not give to recipients.
  3. Annual Testing: Schedule yearly retests.
  4. Data Submission: Email Data Forms to [email protected] (remove names for privacy).
  5. Clean Equipment: Wipe down lens tree and blocker between screenings.
  6. Recycle: Return old glasses for recycling when prescriptions change.
  7. Advise the recipient to handle their new eyeglasses with care to prevent scratching or damaging the lenses and frame. Emphasize the importance of proper storage and cleaning to maintain glasses in good condition.

Additional Notes for Testing

  • Environment: Ensure that the testing area is quiet and free from distractions to help the person focus on the eye charts.
  • Comfort: Make sure the person being tested is comfortable and understands the process. Clear communication is key.
  • Hygiene: Emphasize the importance of wiping down equipment between tests to prevent cross-contamination.

Common Issues and Solutions

  • If the Person Cannot Read Any Lines:
    • Check the distance from the eye chart.
    • Ensure that the chart is clearly visible and well-lit.
  • If There is Confusion on Direction:
    • Use simpler instructions or hand gestures to clarify.
  • If Lenses Don’t Fit Properly:
    • Recheck the lens sizes and ensure correct placement in the frame.
    • Use the Lens Application Tool to assist in fitting.

 Aftercare and Follow-Up

  • Handling Glasses: Remind recipients to store their glasses in a safe place when not in use.
  • Lens Care: Instruct on proper lens cleaning techniques to avoid scratches (e.g., use microfiber cloths).
  • Annual Testing: Stress the importance of regular check-ups to keep prescriptions updated.

Conclusion
Thank you for participating in the First Sight screening process! Your efforts help provide essential vision care. Remember to send completed Data Forms to [email protected] and maintain a clean and organized screening environment.

Contact Information
For any questions or additional support, please contact:
Email: [email protected]

Follow-Up Procedures

  1. Annual Check-ups
    • Importance: Vision can change over time, making regular screenings essential.
    • Recommendation: Schedule annual eye exams to ensure prescriptions remain accurate.
    • Note: Inform recipients that adjustments may be necessary, especially for growing children.
  2. Collecting Feedback
    • Method: After the fitting, ask recipients how the new glasses feel.
    • Questions to Consider:
      • Are the lenses clear?
      • Is there any discomfort?
      • Can they see well at different distances?
  3. Documenting Changes
    • Record Keeping: Keep track of any changes in vision or prescription needs over time.
    • Data Form: Use the Measurement/Record-Keeping Form to note any feedback or changes in vision.

Troubleshooting Common Issues

  1. Difficulty Reading the Chart
    • Check Distance: Ensure the recipient is at the correct distance from the eye chart (20 feet for myopia, 20 inches for hyperopia).
    • Light Conditions: Adjust lighting to eliminate glare and ensure the chart is clearly visible.
  2. Lens Discomfort
    • Adjust Fit: Ensure the frames sit properly on the recipient’s face.
    • Re-evaluate Prescription: If discomfort persists, consider re-evaluating the lens prescription.
  3. Lens Scratches or Damage
    • Handling Advice: Remind recipients to store glasses in the pouch when not in use and to clean lenses with microfiber cloths.
    • Replacement Process: Outline the steps for replacing damaged lenses or frames.

Additional Resources

  • Eye Health Education
    • Provide pamphlets or brochures about eye health, including tips for maintaining good vision.

Final Thoughts
Your participation in the First Sight program plays a crucial role in enhancing vision care for those in need. By following these instructions and utilizing the resources provided, you can ensure that each recipient receives the best possible care.

Thank You!
Thank you for your commitment and dedication to improving vision health. Together, we are making a difference!

Tips For New Recipients of FIRST SIGHT Eyeglasses

Caring For Your New Eyeglasses

  1. The glasses come in white First Sight fabric pouches: Place the glasses in the pouch when you are not using them to prevent getting them dirty or scratching the lenses,
  2. When the lenses get dirty (for example with fingerprints) you may wash them with soapy water and dry them with a clean cloth. Do not use abrasive materials (like your nails) to remove stains, the lenses can scratch easily.
  3. If you’ve been given glasses with strong corrections, like -4.0 or -5.0, or if you haven’t had glasses before, don’t be surprised if you get slight headaches or discomfort during the first couple of few days. Your brain needs to get used to your new vision to acclimate to them, wear your glasses a few hours at a time and take breaks to rest your brain if needed. This will most likely go away after 2-4 days.
  4. If you received “reading glasses” (with a + correction), you probably do not need to always wear them, just when you are reading,
  5. After a few weeks of using your glasses, if you feel that your vision is not perfect, please ask to be retested to assess if your correction needs to be adjusted,
  6. Your vision is likely to change over time. It doesn’t mean that the glasses aren’t working, just that you need new lenses; this can be done with repeating your visual screening and getting new lenses at your school or where you received your original first pair of eyeglasses. You’ll keep your frame. Ask to be retested every year, if possible,
  7. If one of the lenses ever falls from the frame, this can be fixed easily by carefully inserting it in the frame, or better yet, if possible, visit the place where you received the eyeglasses. They will be able to easily fix this.
  8. Guard your eyeglasses for any breakage or damage.
  9. Enjoy your new pair of First Sight eyeglasses.

Please also visit firstsight.org for Donations

First Sight is driven by a heartfelt mission: to bring clear vision to the remote and underserved, especially young learners in developing countries. With our unique kits, we turn blurred worlds into realms of opportunity, promise, and hope.

Help us to make a difference

“Gift the magic of clear vision and transform a life forever with your generosity.”

Copyright © 2024 First Sight. All Rights Reserved.

Support Our Cause
Help our organization by donating today! All donations go directly to making a difference for our cause.
100% secure your website.
Powered by